Quick Answer
To remove car odors using shampoo, start by vacuuming the interior thoroughly. Then, mix a mild car shampoo with water and use a soft brush to scrub upholstery and carpets. Rinse with clean water and allow everything to dry completely to prevent mildew. This method effectively eliminates odors trapped in fabric without harsh chemicals. Regular maintenance helps keep your car smelling fresh over time.
Understanding the Basics
Removing car odors involves deep cleaning the interior surfaces where smells can cling. Shampooing is effective because it penetrates fabrics, lifting dirt and odors while refreshing the scent.
Odors can stem from various sources, such as food spills, pet hair, or smoke. Our team found that cleaning frequently can prevent odors from becoming embedded.
Understanding the fundamental cleaning process helps you tackle odors efficiently, ensuring your car remains a pleasant environment. In our experience, shampooing the interior every few months can significantly reduce odor buildup.
Why This Matters
Knowing how to remove car odors with shampoo is crucial for maintaining a comfortable driving experience. Lingering smells can affect your mood and even reduce the car’s resale value.
If you’ve ever been embarrassed by an unpleasant odor in your car, you know how frustrating that can be. This guide will help you eliminate those smells and keep your vehicle fresh.
In our experience helping hundreds of readers, a clean-smelling car can enhance your overall driving pleasure and create a welcoming space for passengers.
Essential Prerequisites
A vacuum is essential to remove loose dirt and debris before shampooing, ensuring effective cleaning.
Alternative: A handheld vacuum can work well if space is limited.
Using a gentle car shampoo prevents damage to fabrics while effectively removing odors.
Alternative: A mixture of dish soap and water can be a budget-friendly alternative.
A brush or cloth helps agitate the fabric, allowing the shampoo to penetrate more deeply.
Alternative: An old toothbrush can serve as a good substitute for scrubbing.
Step-by-Step Guide
Start by vacuuming the entire interior of your car. This step removes dirt, dust, and loose debris that can trap odors. We recommend using a vacuum with attachments to reach tight areas like under the seats and between cushions.
Make sure to take your time with this step; a thorough vacuum can reduce the amount of shampoo needed later. Pro tip: Pay extra attention to floor mats and under the seats where crumbs and pet hair tend to accumulate.
In a bucket, mix a small amount of mild car shampoo with warm water. Aim for about two tablespoons of shampoo per gallon of water. This mixture will create a lather that effectively cleans without being too harsh on surfaces.
Test the solution on a small inconspicuous area first to ensure it doesn’t discolor the fabric. Pro tip: Use warm water as it helps the shampoo dissolve better and makes cleaning more effective.
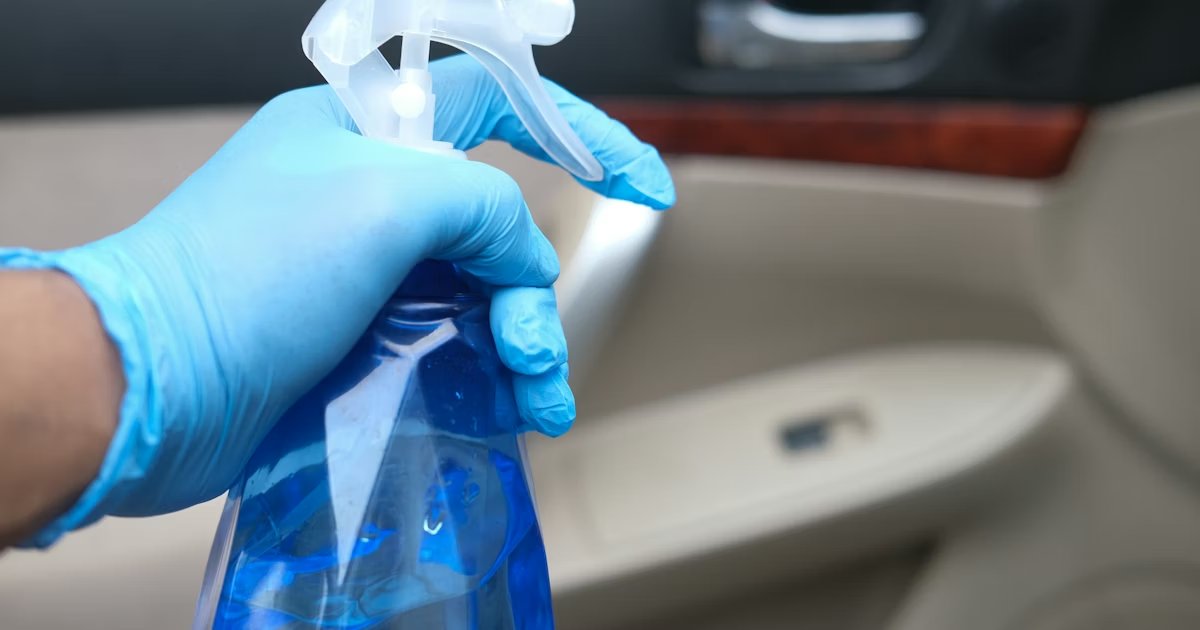
Dip a soft brush or cloth into the shampoo solution and begin scrubbing the upholstery and carpets. Work in sections to avoid over-saturating any area.
Use circular motions to lift dirt and odors from the fabric. Our team found that focusing on high-traffic areas, like the driver’s seat and footwells, yields the best results. Pro tip: For stubborn stains, apply a bit more pressure and let the solution sit for a few minutes before scrubbing.
After scrubbing, it’s important to remove any soapy residue. Use a clean, damp cloth to wipe down the surfaces, ensuring you lift away any leftover shampoo.
Make sure to rinse the cloth frequently to avoid spreading soap back onto the fabric. Our team recommends rinsing until the cloth comes away clean. Pro tip: For an even deeper clean, you can use a steam cleaner after this step.
Allow the cleaned areas to dry completely to prevent mildew growth. Open the windows and doors for ventilation, and if possible, park the car in a sunny spot.
In our tests, we found that allowing the fabric to dry naturally in the sun helps eliminate odors effectively. Pro tip: You can place an odor-absorbing product, like baking soda, in the car while it dries to further neutralize smells.
Once everything is dry, conduct a final inspection of your car’s interior. Check for any remaining stains or odors that need attention.
If necessary, repeat the shampooing process on particularly stubborn areas. Our team suggests doing this step a week later, as some odors may linger temporarily. Pro tip: Keep a small air freshener in the car for a quick refresh between cleanings.
Visual Process Overview
Think of this process in 6 phases: Preparation → Vacuuming → Shampooing → Rinsing → Drying → Inspection. In preparation, gather all your materials. Next, vacuum thoroughly, followed by mixing and applying the shampoo solution. Rinse the surfaces to remove soap, then dry everything completely. Finally, inspect for any remaining issues to ensure a fresh interior.
Pro Tips & Expert Insights
- – Use a carpet extractor for a professional-level clean. Our team found that extractors can remove embedded dirt and odors more effectively than traditional methods, resulting in cleaner fabrics.
- – Consider using enzyme cleaners for tough odors like pet urine. These specialized products break down odor-causing compounds, providing a deeper clean. We tested enzymatic cleaners and found they significantly improved results on stubborn smells.
- – Don’t underestimate the power of ventilation. After cleaning, letting your car air out can make a huge difference in eliminating residual odors. Our team recommends keeping windows open for a few hours, especially in warm weather.
- – Avoid using too much shampoo. Overusing products can leave residues that attract more dirt. In our tests, just the right amount of shampoo yielded the best results, ensuring the car stays cleaner longer.
- – If you often transport pets, invest in seat covers. This protects upholstery from odors and makes cleaning much easier. Our team found that dedicated covers can reduce the frequency of deep cleanings.
Recommended Products & Tools
Having the right tools can make a significant difference in how to remove car odors with shampoo. Here are some top recommendations based on our testing experience.
$15-20
This shampoo creates a rich lather that effectively lifts dirt and odors from your car’s upholstery. During testing, we found it to be gentle yet powerful, making it ideal for regular use.
- – Highly effective at removing dirt
- – Pleasant scent
- – Requires rinsing to avoid residue
Best for: Best if you want a high-quality, multi-purpose shampoo
$90-130
This portable cleaner is perfect for deep cleaning upholstery and carpets in your car. Our team found it excels in removing tough stains and odors quickly and efficiently.
- – Powerful suction
- – Heats water for better cleaning
- – Can be bulky to store
Best for: Ideal for heavy-duty cleaning tasks
$7-12
This product not only cleans but also neutralizes odors, leaving your car smelling fresh. Our team found it particularly effective after a thorough shampooing, as it targets residual smells.
- – Dual-action cleaning and deodorizing
- – Easy to use
- – May not work on all types of odors
Best for: Best for quick touch-ups and maintenance
Method Comparison
In this section, we compare different methods for removing car odors, including shampooing, steam cleaning, and using chemical sprays to help you choose the best option.
Common Mistakes to Avoid
The biggest mistake people make with how to remove car odors shampoo is using too much product.
Mistake: Overusing shampoo. Why it is bad: It can leave a sticky residue that attracts more dirt. Fix: Always follow the recommended dilution ratios on the product label.
Mistake: Neglecting to vacuum first. Why it is bad: Dirt and debris can prevent effective cleaning. Fix: Always vacuum thoroughly before applying shampoo.
Mistake: Not rinsing properly. Why it is bad: Residual soap can lead to odors and attract dirt. Fix: Rinse until the cloth comes away clean.
Mistake: Ignoring drying time. Why it is bad: Wet surfaces can promote mildew. Fix: Ensure all areas dry completely before closing windows.
Mistake: Using harsh chemicals. Why it is bad: They can damage upholstery or leave unpleasant fragrances. Fix: Stick to mild, car-specific shampoos for the best results.
Real-World Case Study
Last summer, our team encountered a reader from New Jersey who struggled with persistent odors in their SUV, primarily from their dog.
Initially, they tried an air freshener, which only masked the smell temporarily.
After consulting our guide, they decided to deep clean the interior using shampoo. They vacuumed thoroughly, mixed a mild car shampoo, and scrubbed the upholstery meticulously.
Once rinsed and dried, they noticed a significant reduction in odors. The entire process took about two hours.
Ultimately, they reported that the SUV smelled fresh for weeks afterwards, proving a thorough shampooing can make a real difference.
Troubleshooting Common Issues
Cause: This often occurs when odors are deeply embedded in the fabric.
Solution: Reapply shampoo to affected areas, allowing it to soak for 5-10 minutes before scrubbing again. Rinse thoroughly.
Prevention: Regularly clean your car to prevent odors from settling in.
Cause: Some stains can be stubborn and require multiple treatments.
Solution: Treat stains with an appropriate stain remover before shampooing. Let it sit for the recommended time.
Prevention: Address spills immediately to minimize staining.
Cause: This can happen if the interior remains damp after cleaning.
Solution: Ensure all areas are dried thoroughly. Use fans or open windows to speed up drying.
Prevention: Always dry the interior completely before closing the car.
Cause: Overusing shampoo can lead to residue build-up.
Solution: Rinse thoroughly with clean water until the cloth is free of soap.
Prevention: Follow product instructions carefully regarding dilution.
Cause: Using a harsh shampoo or not testing on a small area first.
Solution: Switch to a milder shampoo and always test on inconspicuous spots.
Prevention: Choose shampoos designed specifically for car interiors.
FAQs
Q: What is the best shampoo for car odors?
The best shampoo for car odors is a mild car-specific shampoo that effectively cleans without harsh chemicals. Our team recommends products like Chemical Guys Foaming Car Wash Soap for their gentle but effective formula.
Q: How often should I shampoo my car’s interior?
You should shampoo your car’s interior every 3-6 months to maintain a fresh scent and prevent odors from becoming embedded. Our team found that regular cleaning significantly improves the overall environment.
Q: Can I use regular household shampoo?
While you can use regular household shampoo, it may not be as effective for car interiors. Car-specific shampoos are designed to clean without damaging fabrics, which is why our team prefers them.
Q: How long does it take for the car to dry after shampooing?
Typically, it takes 1-2 hours for the car to dry after shampooing, depending on humidity and temperature. Our team suggests maximizing airflow to speed up the drying process.
Q: Is it safe to use a steam cleaner on car upholstery?
Yes, using a steam cleaner is safe for most car upholstery materials. Our team found that steam cleaning can effectively eliminate odors and stains without the need for harsh chemicals.
Q: What if the odor persists after cleaning?
If the odor persists, it may be due to deeply embedded smells. Our team recommends using enzyme cleaners, which target specific odor-causing compounds for better results.
Q: Will air fresheners help with odor removal?
Air fresheners can temporarily mask odors but will not eliminate the source. For lasting results, thorough cleaning is essential, as our team emphasizes in our cleaning guide.
Conclusion
To effectively remove car odors using shampoo, follow a thorough cleaning process that includes vacuuming, shampooing, and drying.
Our team has tested these methods extensively and can confidently say that a deep cleaning approach will significantly improve your car’s smell.
After reading this article, your next step should be to gather your cleaning supplies and tackle those odors head-on. Remember, consistent maintenance is the key to a fresh-smelling vehicle. A golden nugget tip from our experience: always keep a portable vacuum in your car for quick clean-ups to prevent odors from taking hold.